










Summary:
- For first installs, pick the parking spot, plan the shortest power path, and stick to Level 2. Do that, and electric car charging stations come together cleanly.
- Permits, safe work habits, and simple hardware choices beat guesswork; cost moves with panel capacity, trench length, and networking needs.
- The blog explains a step-by-step process for siting, wiring, and maintaining electric car charging stations, and how coverage caps bad days while you scale.
Installing electric car charging stations for the first time? We wish it were as easy as “mount a box and plug it in.”
You are creating a path for power and inviting people to use it every day. So, with this step-by-step guide, let’s get your first install done right.
We’ll cover both home electric car charging stations and public electric car charging stations, calling out the few places where the steps differ. You’ll learn what drives schedule, what drives risk, and what drives cost without getting buried in jargon.
7 Steps to Installing Electric Car Charging Stations
Breaking this down into seven digestible steps, covering everything from methods to compliance.
Step 1: Decide on the site and the purpose
Pick the parking spot first, not the brand first. For electric car charging stations for home, garages are easiest; outdoor pedestals work fine with the right weather rating. For public use, choose stalls that people already pick, with room to park, turn, and walk safely.
- Aim for short, straight power runs. Shorter runs usually mean lower cost and fewer problems
- Confirm you’re doing Level 2, that’s 208/240-volt service and a dedicated circuit sized to the unit
- Think cable reach and holster height so drivers can use it without dragging cables across walkways
Step 2: Plan the electrical path and the crew
Walk the route from panel to charger and count every bend and obstacle. Then pick the subs you need.
- Travel from panel to conduit to charger, as indoors may be surface-mounted and outdoors may need trenching and a pedestal.
- Owner-managed with multiple subs works well: a licensed electrician, a concrete/asphalt crew if you need pads or trench patches, and a sign/paint vendor for striping
- For public sites, add a network/payments vendor early so you know what hardware and signal they require
Step 3: Permits, utility touchpoints, and code
Pull the permit before you buy gear. Ask the inspector what they expect to see.
- Reference NEC 625 for EV supply equipment. Your electrician for electric car charging stations will size the circuit, along with overcurrent protection and code disconnects
- If the panel is marginal, do a load calculation and plan an upgrade or a load management device
- For public sites, confirm lighting, accessible stall layout, and clear signage. Your Authority Having Jurisdiction will tell you what they want on the plans
- Call for inspection after rough-in and again after final. Keep approval tags with your records
Step 4: Choose the right hardware
Match the unit to the job. Think about weather rating, mounting, cable management, and network needs.
- Home electric car charging stations:
A reliable Level 2 unit, hardwired if outdoors, with a sturdy holster and a long enough cable to reach your car’s port. - Public electric car charging stations:
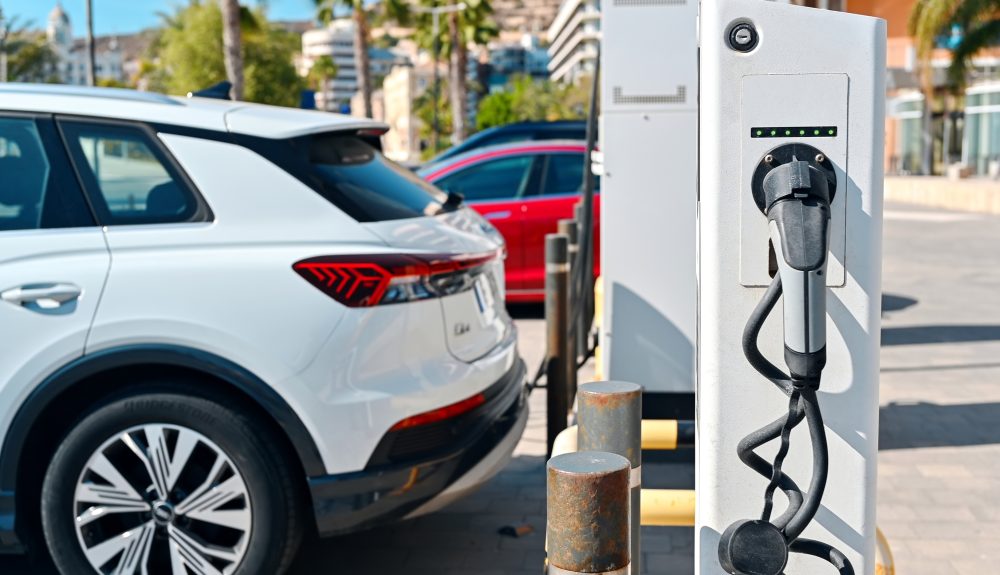
A Level 2 pedestal with clear screens or labels, tamper-resistant hardware, simple payment options (tap or app), and visible status lights.
For both, check the listing mark (UL or equivalent), warranty, and support. Keep spares for holsters and cable clamps.
Step 5: Install safely
Keep people and property safe while you build with these simple steps to prevent headaches.
- Mark underground utilities before you dig, and set cones and signs so pedestrians can see and steer
- De-energize before you work, lock out the breaker, and test to make sure the circuit is dead
- Use proper connectors and weather-rated boxes, and also bond and ground per the manufacturer’s instructions
- Torque lugs to spec and close every panel with the right screws so water and dust stay out
Step 6: Commission and test like a customer would
Turn it on only when everything is buttoned up.
- Power up, check the display, and verify voltage at the unit
- Update firmware if the unit requires it, then start a real charging session
- For public sites, run a live payment test and a receipt test. Label a “help” number on the pedestal
- Photograph the install, the labels, and the first session. Save these with the manual and the inspection approvals
Step 7: Operate and maintain without hassles
A little routine keeps your stations online and your customers happy.
- Weekly: Check cables, holsters, and screens; clean the unit; confirm sessions are posting
- Monthly: Test a charging session, check breakers and connections, and trim shrubs or snow berms around the stall
What Drives the Cost of Electric Car Charging Stations
There isn’t one number, but there are common drivers.
Short runs, open walls, and strong panels cost less. Long trenches, panel upgrades, saw-cut and patch work, and complex signage cost more.
Public jobs add payment hardware and networking. Doing it once the right way will be cheaper for you than rework. Make sure you place your electric car charging station where people will actually use it and where your electrician can reach it cleanly.
Coverage To Help You Build With Protection
Even good installs have bad days. Back your work with coverage that matches how you build and operate:
- Inland Marine for chargers and gear in transit, and before they move to a property schedule.
- General Liability for third-party injury or property damage, plus Umbrella for extra headroom.
- Property with Equipment Breakdown and Business Income for public sites that depend on uptime.
- Workers’ Compensation for crews on the install and service calls.
- Auto Liability for service vehicles.
- Cyber and Crime when you run payment-enabled public units.
Good photos and a signed commissioning log make claims faster and fairer. Controls reduce how often things go wrong, and coverage limits how bad it gets.
Pick the spot, plan the path, follow the code, and install with care. Do that, and your first electric car charging station project feels less like a leap and more like a repeatable job.
When you are ready to scale, bring UtilityPro in to align your coverage with the way you work. UtilityPro is designed for businesses such as yours and is backed by 35 years of industry expertise to support you in strengthening and securing your business.
Ask your broker to connect you with UtilityPro today, or contact us directly to learn more.
FAQs
- What are the different types of charging stations?
Three main types of electric car charging stations: Level 1 (120V, slow, overnight), Level 2 (240V, daily use at homes and businesses), and DC fast chargers (quick turnarounds at public electric car charging stations). Pick by dwell time and power. - What are the safety precautions for using charging stations?
At electric car charging stations, park squarely, set the brake, and watch the cable. Don’t use damaged plugs. Keep cords off walkways, return the connector to its holster, and avoid extension cords. If anything smells hot, stop and call. - What is the best EV charging station for homes?
For home electric car charging stations, a hardwired Level 2 unit with a UL listing, 25-foot cable, and weather rating is a smart pick. Confirm panel capacity first, then choose simple app features you’ll actually use. - Which is the best insurance for electric car charging stations?
The best insurance for electric car charging stations is a specialty package that mirrors your work: General Liability, Property with Equipment Breakdown and Business Income, Workers’ Comp, Auto, plus Cyber for payment-enabled units. UtilityPro fits this mix.