











Summary
- Pool construction runs through 10 phases, each with different crew requirements, timelines, and risk exposures.
- Excavation, plumbing rough-in, and shell application are where most contractor liability is concentrated.
- In this blog, we walk through every step of the pool construction process so builders know what to expect at each stage.
A pool build involves permits, heavy equipment, structural concrete, and subcontractors operating under code requirements that vary by municipality. Every phase adds to your schedule and your exposure as a contractor.
This guide covers the full pool construction process and the steps in building a pool, from the first site visit to handover, with a focus on where the real risks sit.
Types of Pools and How the Building Process Differs
The process of building a pool changes depending on the shell type. Your choice shapes the timeline, crew, and liability exposure from the start.
- Concrete (Gunite/Shotcrete): Most flexible design-wise, but the longest build. Curing is non-negotiable and adds weeks.
- Fiberglass: Pre-made shell craned in and backfilled. Fast installation, limited design options.
- Vinyl Liner: Lower upfront cost, but liners wear out and need periodic replacement.
The Pool Building Process: Step by Step
Step 1: Site Evaluation and Pre-Construction Planning
Before any equipment arrives, you’re assessing soil conditions, groundwater, drainage, site access, and utility locations. Rushing this stage is how projects collect surprise costs mid-dig.
Building a pool near unmarked utilities is one of the most avoidable mistakes in the business. Call 811, the national dig-safe service, before anyone breaks ground.
Step 2: Design, Engineering, and Permits
Every pool construction project needs design documents covering structural loads, hydraulic calculations, equipment sizing, and code compliance. Permit timelines vary by municipality and are hard to predict. You’ll typically need:
- Building permit for the pool structure
- Electrical permit for bonding, grounding, and lighting
- Plumbing permit for circulation, drainage, and water features
Drawings that don’t match the actual build create failed inspections and mid-job rework. Sort the design before breaking ground.
Step 3: Excavation and Site Preparation
This is where the pool construction job gets physically dangerous. OSHA ranks trenching and excavation among the most hazardous construction operations, with cave-ins leading the list. Workers cannot enter an open excavation without protective systems in place.
Key risks during the dig:
- Soil collapse, especially in looser or sandy ground
- Striking an unmarked utility line underground
- Equipment hitting a worker on foot near the excavation
- Property damage to neighboring structures from spoil movement
Site conditions are more variable than most schedules account for. Read how weather extremes are changing how pool builders manage risk.
Step 4: Steel Reinforcement and Structural Shaping
After the excavation is signed off, the rebar cage goes in to form the pool’s structural skeleton. Spacing, diameter, and coverage depth all need to hit the engineering specs before the inspector approves the next phase.
Rebar problems are invisible once the concrete covers them. If the placement was off, you’ll likely find out when a crack appears in the shell years down the line. A quick photo before the pour is the easiest documentation habit a contractor can have.
Step 5: Plumbing and Electrical Rough-In
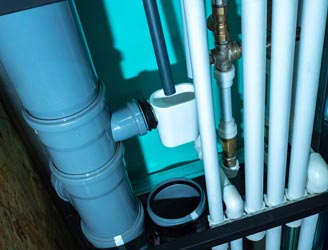
Plumbing and electrical get roughed in before the shell goes on. Plumbing covers drains, returns, skimmers, and circulation. Electrical covers bonding, grounding, lighting, and automation.
Bonding and grounding failures under NEC Article 680 are an electrocution risk and a serious liability. Plumbing mistakes are less obvious but equally costly; a bad seal or skimmer fitting creates a slow leak underground that causes damage long after the job closes.
Step 6: Shotcrete or Gunite Application
This is the phase most clients are waiting to see. Concrete gets sprayed over the rebar at high pressure to form the shell. How it turns out depends largely on the nozzle operator’s skill and what the weather is doing that day.
So, how long does shotcrete take to cure? Around 28 days for concrete pools to reach full structural strength, with the first seven to ten days requiring wet curing to keep the surface moist. Contractors who compress this window to keep the schedule moving tend to see it come back as voids, cracking, or claims.
Must Read: Year-Round Insurance for Pool Equipment Distributors
Step 7: Tile, Coping, and Interior Finishes
With the shell cured, waterline tile goes in, coping gets set at the top wall edge, and the interior finish is applied. Plaster, quartz, and pebble are the standard choices for concrete pools.
Plaster delamination and staining are the most common post-completion complaints in pool construction. Poor surface prep and off-water chemistry at startup are usually the cause. A poorly sealed coping-to-deck joint lets water in, and settling follows.
Step 8: Decking and Surrounding Hardscape
Most jobs include concrete or paver decking, drainage channels, and coping transitions. Problems here tend to surface after the project is already closed.
- Trip hazards from joints that weren’t finished flush or pavers that settled
- Drainage running toward the foundation instead of away from it
- Expansion joint cracking from poor sub-base preparation
If the deck work goes to a sub, you’re still responsible for the finished result. Get certificates of insurance from everyone on the job.
Step 9: Equipment Installation
Once the shell and deck pass inspection, equipment installation begins: pump, filter, heater, sanitization system, automation, and lighting. Sizing matters more than most contractors budget for at the spec stage.
An undersized pump won’t circulate the water correctly. An oversized heater wastes energy and risks voiding the manufacturer’s warranty. Both create service calls that come back to you.
Contractors expanding into spa and hot tub installs should know that smart spa trends are reshaping installation and insurance.
Step 10: Startup, Testing, and Project Handover
The last phase covers filling the pool, balancing water chemistry, testing all equipment, and walking the owner through operation and maintenance. Pool chemicals can be hazardous if stored or mixed incorrectly, per the EPA, so startup protocols matter.
Completed operations exposure begins at handover. Any claim tied to the build traces back to you. Keep handover records, chemistry logs, and site photos. As pool infrastructure ages across the country, repair jobs carry more of this long-tail risk than they used to.
Pool Construction Timeline: How Long Does Each Stage Take?
A standard in-ground build runs 8 to 16 weeks from excavation to startup. Add design and permitting, and the full pool construction timeline stretches to 3 to 6 months:
| Phase | Typical Duration |
| Design, engineering, and permitting | 3 to 11 weeks |
| Excavation and site prep | 1 to 3 days |
| Steel, rebar, plumbing, and electrical | 3 to 8 days |
| Shotcrete or gunite application | 1 day |
| Curing period | 2 to 4 weeks |
| Tile, coping, finishes, and decking | 2 to 4 weeks |
| Equipment installation | 2 to 4 days |
| Startup and testing | 1 to 3 days |
Permitting is where most pool construction timelines slip. Municipal backlogs and permit drawings that need revision can add weeks before a shovel goes in the ground.
Risk Across the Pool Building Process: A Phase-by-Phase View
Each stage of pool construction brings a specific type of liability exposure. Here is how the stages of pool construction map to insurance considerations:
| Construction Phase | Primary Risk | Insurance Consideration |
| Planning and design | Design errors | Errors and omissions |
| Excavation | Utility strikes, cave-ins | General liability |
| Structural reinforcement | Workmanship defects | Completed operations |
| Plumbing and electrical | Bodily injury, hidden defects | GL and workers’ comp |
| Equipment transport | Vehicle accidents | Commercial auto |
| Jobsite equipment | Theft and damage | Inland marine |
| Post-completion | Future owner claims | Completed operations |
Protect Every Phase of Your Pool Construction Business
From the first dig to final handover, pool construction carries real financial exposure at every phase. Workmanship claims, excavation incidents, and completed operations liability are the claims pool contractors actually deal with.
PoolPro is NIP Group’s specialty program for pool, spa, and hot tub contractors. It covers general liability, workers’ compensation, commercial auto, inland marine, and errors and omissions, among other coverages. NIP works with A+ rated carriers, meaning carriers with a superior financial strength to pay claims when they matter.
See what the program covers on the pool business insurance, or reach out through the NIP Contact page.
Frequently Asked Questions
Should I use shotcrete or gunite for a concrete pool?
Gunite is a dry mix; water is added at the nozzle on site, giving the operator more control over consistency. Shotcrete arrives pre-mixed, which speeds up application. Both produce the same structural result. Quality comes down to the nozzle operator’s experience and how curing is handled after the pour.
Why do pool construction timelines vary so much between jobs?
The construction phases are consistent. What shifts the pool construction timeline are the variables around them:
- Permit review can run from two weeks to two months, depending on the municipality
- Shotcrete curing adds a fixed, non-negotiable window to every concrete build
- Unexpected soil conditions or groundwater slow the excavation phase
When does a pool contractor’s liability exposure start and end?
It starts day one and does not end at handover. Covered plumbing and electrical defects stay your liability if they surface later. After the handover, completed operations claims for cracking shells or leaks come back to the contractor. Documentation through every phase is what makes those claims defensible.
What project records should a pool contractor keep?
Records that matter most in a dispute:
- Photos of rebar placement before shotcrete, since that phase is not revisitable once it’s done.
- Signed inspection reports at excavation, rough-in, and pre-plaster milestones.
- Written handover notes with water chemistry readings and equipment test results.
- Certificates of insurance from every subcontractor on the job.